

I love patterns, prints, and color. I also love spoiling my dog, Padfoot. One way I spoil him is by making him collars for all our "special" occasions. By wrapping fabric around the dog collar, the possibilities for adorable dog collars are endless.
In my previous post, I made a leash to go with Padfoot's every day collar. They look great together. Now, you can make a collar to go with the dog leash you made or a collar for an occasion!
Materials: Nylon webbing, fabric, thread, triglide, buckle, D-ring, interfacing, iron
1. Use the following table to determine exactly what materials you need:

The M-Extra size is perfect for medium sized but fluffy dogs (like Padfoot.) It creates a thicker but still medium length collar.
These kits are the easiest and cost effective was to get most of your materials:
Deluxe Dog Collar Kit With 3/4 Inch Nylon Webbing Makes 10 - 3/4 Inch Dog Collars-BrownDeluxe Dog Collar Kit With 5/8 Inch Nylon Webbing Makes 10 - 5/8 Inch Dog Collars-Black
I know enough to make 10 collars may seem like a lot, but when you consider that your dog NEEDS an everyday collar, a fancy collar, a patriotic collar, a Halloween collar, a Thanksgiving collar, a winter holiday collar, a Valentine's Day Collar, a St. Patrick's day collar, an Easter collar....you get the idea. You'll make 10 collars before you know it! Another great option is to start making them as gifts for your friends with dogs. Collars like this easily sell for $20 online, so making them yourself is a great deal.
2. Cut your fabric and interfacing to the Fabric Size listed in table. You can use scraps of interfacing if necessary. The interfacing will make the collar stronger and more durable.

3. Iron interfacing to the wrong side of your fabric (opposite pattern side). Follow the instructions for your interfacing and use the appropriate setting on your iron for your fabric. I used cotton, so I used the cotton setting.

4. Fold a 1" hem on each short side of the fabric and iron it in place.

5. Fold your fabric along the long side (aka hotdog style). Iron this fold in place.

6. Fold each side of the long side towards to center. Iron this fold in place. Your fabric should now be folded and pleated into even fourths with a 1" hem on each side.
 |  |
7. Cut your webbing to the Webbing Length list in the table.

8. Wrap your webbing in your fabric. Unfold your fabric and place the webbing in the outside pleat. Place the webbing under the 1" hem on the outside edges. Then, fold your webbing along the pleats causing the fabric to wrap around it. Pin the fabric in place to the webbing.
 |  |
9. Sew the edges of your collar down. Load your collar under the foot with the edge close to the needle. Sew down one side. When you get to close to the edge, stop, lift the foot but leave the needle in, rotate your fabric 90 degree, and sew next edge. Repeat this until you are back to where you started.
 |  |
10. Attach the triglide. Thread one side of the fabric around the middle and pull it through about an inch or two. Stitch down the width of your collar by sewing the loose end back to the collar itself. Back over the entire stitch to make sure it is secure. Place a second line of stitched closer to the triglide for added security.
 |  |
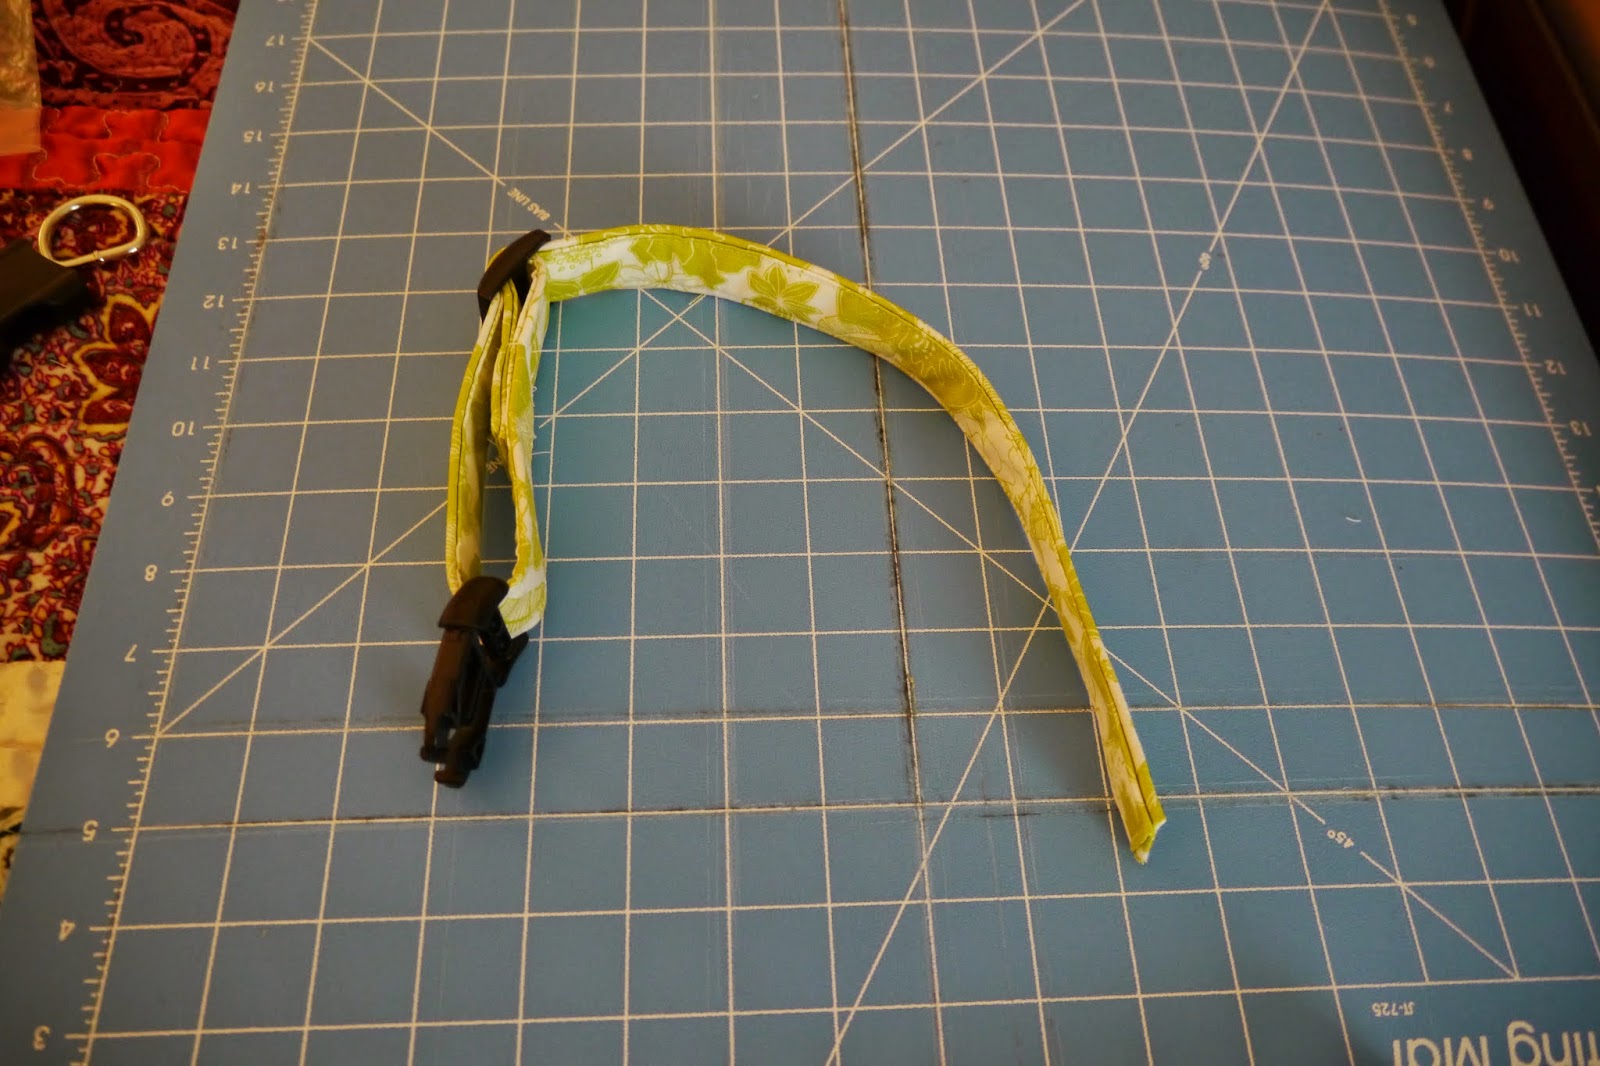
11. Attach the male part of your buckle. String the male part of you buckle through your collar.

12. Fold the fabric back through the triglide.
 |  |
13. Attach the D ring and female part of your buckle. Back over all seams for security!
- Place the D ring on FIRST, then place the female buckle on.
 |  |
- Pull the end of the fabric through the buckle about 3 inches and sew the free end back to the collar. Once again, I backed over the entire seam to secure it.

- Slide the D ring down against this seam, and sew another seam as close to the buckle as you can get.


14. Adjust the triglide to make the collar the appropriate length for your dog's neck.
15. Place and the collar around your dogs neck and buckle shut.

I hope you love the look of this dog collar. If you're looking for a way to make your dog's collar extra special, check out how to make a Detachable Bow(tie) or Flower!
what type of sewing machine is used and what type of thread?
ReplyDeleteSo I just tried this because I wanted to make collar's for my dogs and it was so easy to follow! Thank you!
ReplyDeleteThis is a great idea for making unique and stylish dog collars.
ReplyDelete